Mini Bagel Bruschetta with Peppers and Gorgonzola -- Barefoot Bloggers Budget Challenge


Our Barefoot on a Budget Challenge for May is Ina's Bruschetta with Sautéed Sweet Pepper and Creamy Gorgonzola. The Barefoot on a Budget Challenge is a new feature for Barefoot Bloggers members where we are challenged to make a Barefoot Contessa recipe and made any substitutions needed to shave a little off the grocery bill that week.


Here is the original recipe with my changes noted...

Bruschetta with Sauteed Sweet Peppers and Creamy Gorgonzola

Good olive oil
1 red bell pepper, seeded and sliced into thin strips
1 yellow bell pepper, seeded and sliced into thin strips
1/2 teaspoon sugar
1 tablespoon capers, drained -- didn't measure, just tossed some into the pan
2 tablespoons julienned fresh basil leaves -- used dried basil from the pantry $$
Kosher salt
Freshly ground black pepper -- left this out, not a pepper fan
Baguette -- used mini bagels instead $$
3 ounces creamy Gorgonzola or other blue cheese, at room temperature -- I used a non-imported (cheaper) Gorgonzola than I usually buy $$

Preheat the oven to 375 degrees F.


Heat 2 tablespoons of olive oil in a medium saute pan over medium-high heat -- I just used Pam cooking spray. Add the peppers and cook until soft, about 12 to 15 minutes. Sprinkle with the sugar and continue cooking for 2 more minutes.

Stir in the capers and basil, and season, to taste, with salt and pepper. Set aside.


Slice the baguette crosswise into 18 thin round slices. Brush the bread rounds lightly with olive oil on 1 side.

Arrange them in rows, oil side up, on a sheet pan lined with parchment paper and toast in the oven until lightly browned, about 7 to 10 minutes.

Top each toast round with a teaspoonful of the pepper mixture. Place 2 small pieces of Gorgonzola on top. Return the toast to the oven for 1 to 2 minutes and warm through. Serve immediately.


Before and after baking...


Changes & Results: At first I was going to bake my own baguette as part of the budget challenge but then I remembered the mini bagels we buy for the kids who love to make mini pizzas with them, okay, I admit it, I like to make mini bagel pizzas too. I thought that some Little Lender's Mini Bagels would be the perfect substitution for a baugette and they were. The mini bagels got nice and crispy crunchy on the outside and stayed a touch soft and chewy under all of that cheesy pepper goodness.

I really enjoyed this recipe! The flavors were amazing together, I loved the hint of sugar and what it added to the peppers while sauteeing. I did not sautee them quite as long as Ina suggests, I like my peppers to have a little crunch left in them, I'd say I sauteed about 5-7 minutes. Other changes were not to measure out the capers, basil, or gorgonzola, I just added what I thought would work out. I'm pretty sure I used quite a bit extra gorgonzola, I just sprinkled on a little mountain of cheese and hoped for the best. The cheaper brand of non-imported gorgonzola was wonderful, I really couldn't tell a difference compared to the non-crumbled imported wedge I usually buy, but I didn't have them side by side or anything for a taste test.


Another favorite Barefoot Contessa recipe for me, these were amazing and a great adult alternative to mini bagel pizzas -- and made a nice light lunch with a salad while the kids had their own 'top your own' mini bagel pizza night :)

knit fit

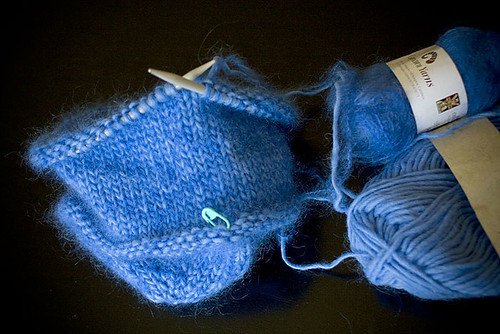
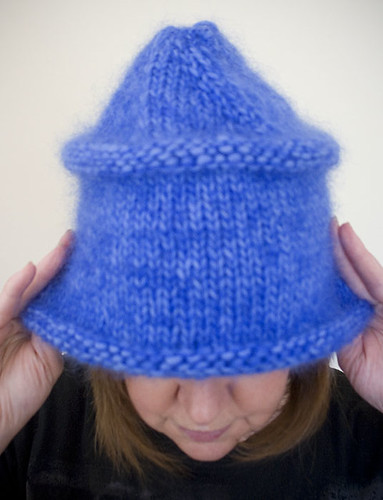
This post was suppose to be about my beautiful new blue felted hat, but instead it’s about my beautiful ball of blue yarn... that was almost my beautiful new blue felted hat.

hat for felting

Each project teaches me many new things. Usually I unknit (aka tink) several times, often knit pick, occasionally rip back several rows. These are all activities that help keep your knitting skills sharp.

hat in progress

Well this project sharpened none of my knitting skills. It was a breeze to knit. I could talk and knit. Watch a movie and knit. Drive and knit. Well, maybe not that last one, but you get the idea. While binding off the second to the last stitch, I decided to take it into my local knitting group to make sure they thought it was the right size for felting. Would it shrink too much to fit my head? Here comes that lesson part of the project. The hat would turn out to be at least three inches too small and that I am a tight knitter. Note to self: always knit a gauge swatch, even if you’re following a pattern down to the same yarn, same gauge, same needle size.

I ditched the size 10.5 needles and purchased size 13 double pointed and circular needles to compensate for my tight knitting issue. I left the shop $19 poorer and a bit frustrated, but glad to have the advice at this point instead of finding out too late. Oh, did I mention the yarn is Capricorn mohair that I ordered from the U.K.? There are actually two strands knit together. The other is Reynold’s Lopi. The good news, I don’t have to purchase more of it... yet.

Now on to getting that hat knit and felted before snow falls.

blue yarn

sweet surprises...

My daughter wrote this beautiful poem and I just had to share...

MORNING

A streak of light peeks over the ocean
Hits the water and makes it glisten

The wet rocks glow like a fire's light
Waiting to glow again after night

The sun is low in the pale blue sky
Busting in flame and never shy

Barefoot people walk on the sand
Watching it all, there I stand

In the cool water I am waiting
Waiting for the sights of morning

Ina's Outrageous Brownies -- Barefoot Bloggers


Time for more brownies! Our second Barefoot Bloggers pick for May is Outrageous Brownies, picked by Eva of I’m Boring, thank you, Eva! I think this is my new favorite brownie recipe :)
Barefoot Contessa Outrageous Brownies

1 pound unsalted butter
1 pound plus 12 ounces semisweet chocolate chips, divided
6 ounces unsweetened chocolate
6 extra-large eggs
3 tablespoons instant coffee powder
2 tablespoons real vanilla extract
2 1/4 cups sugar
1 1/4 cups all-purpose flour, divided (1 cup for batter and 1/4 cup in the chips and nuts)
1 tablespoon baking powder
1 teaspoon kosher salt
3 cups diced walnut pieces

Preheat oven to 350 degrees F. Grease and flour a 13 by 18 by 1 1/2-inch sheet pan.


Melt together the butter, 1 pound chocolate chips, and unsweetened chocolate on top of a double boiler. Cool slightly. Stir together the eggs, instant coffee, vanilla and sugar. Stir in the warm chocolate mixture and cool to room temperature.


Stir together 1 cup of the flour, baking powder and salt. Add to cooled chocolate mixture. Toss the walnuts and 12 ounces of chocolate chips with 1/4 cup flour to coat. Then add to the chocolate batter. Pour into prepared pan.


Bake for about 30 minutes, or until tester just comes out clean. Halfway through the baking, rap the pan against the oven shelf to allow air to escape from between the pan and the brownie dough. Do not over-bake! Cool thoroughly, refrigerate well and cut into squares.


Notes: I halved this recipe and baked it in a 9 by 13 pan. I did not make any substitutions or changes except to leave out the walnuts. For my instant coffee powder I used General Foods International French Vanilla Nut, which added a great depth of flavor. I absolutely loved these, first, they were really easy, no hard to find ingredients required, perfect balance of semisweet and unsweetened chocolate, and no guessing with the baking, I set the timer for 30 minutes, pulled them out, and they were perfectly done.

These were a more delicate fudgey brownie than sturdy and chewy, so if those are your favorites you might not enjoy these as much. I love that these can be personalized with any kind of add-in in place of the walnuts, next time I make them I am going to swirl some caramel in the batter -- yum! Even though our household is on brownie overload from the TWD Chipster Topped Brownies from Tuesday, I am so glad I went ahead and made these "Outrageous" brownies too, they are amazing :)

Chipster Topped Brownies -- Tuesdays with Dorie


This is going to be a short TWD post, first off, thank you to - Beth of Supplicious, who picked Dorie's Chipster Topped Brownies for us to try as our treat of the week. After a busy Memorial Day weekend, I decided to bake these brownies today -- Tuesdays morning! I am usually a Monday night baker, or Sunday morning if I have some extra time, but these were an actual Baked on Tuesday treat.

I liked the idea of this recipe, a yummy brownie bottom and cookie top, I had in my mind what I thought these would look like, but then I saw a few posted photos in the P&Q section and was surprised to see they were more brownie like than half brownie and half cookie like I expected.

Changes I made were to use semisweet chocolate in place of the bittersweet. After doing a few chocolate recipes early on with Tuesdays with Dorie that used a lot of bittersweet and not being happy with the results I decided that it was okay to not *love* bittersweet chocolate like the masses, it's okay to like semisweet or -- gasp -- the dreaded milk chocolate, can that even be called chocolate? I don't know, but I like it. Much better than I like anything bittersweet.


Not too many photos this time around, above is the brownie layer, and below is the cookie layer spread over the brownie layer.


I baked these at 350 as specified, in a foil lined pan (instead of parchment or wax paper) -- sprayed with Baker's Joy. The pan was a simple single ply Wilton 9 by 13. I have an insulated 9 by 13 but with the warnings of underdone brownies in the P&Q I thought single ply would be the way to go. I love the insulated 9 by 13 for bars where you don't want them to be too crispy on the bottom or sides -- the insulated pan worked perfectly for the Caramel Crunch Bars we made with TWD a few months ago.

My kitchen timer was set for 50 minutes, after 20 I tented the brownies to prevent the cookie part from over browning. At 50 minutes I took them out and decided they weren't done, popped the back in the oven for an extra 10 minutes, so 1 hour total. Now they are cooling. I am so nervous about having them underdone, I think I will let them cool all day and maybe leave them in the pan overnight in the fridge before attempting to remove them from the pan and slice them.

Check back next Tuesday for Cinnamon Squares, which look absolutely delicious, and the conclusion of Chipster Topped Brownies -- I hope for edible results!

let us eat cake

Happy Birthday Portland Peeps!!! One year old today!

cake

This blog began as a way to tell the world about raising chickens on a small city lot. How to grow a bit of your own food in a small space. How to make the best use of what we have and enjoy being a little more self-sufficient. This blog has also become a vehicle for expressing myself, an outlet for things creative and otherwise. A reason to write. A reason to photograph what I see and what I do. It inspires me to try new things. I am grateful for those who read what I have to say. And I am especially grateful to those of you who leave comments and share a piece of your lives with me. Thank you!

Mini Sour Cherry Pies with Pistachio Crumble -- Sweet Melissa Sundays


Today's pick for Sweet Melissa Sundays comes from my blogging friend Michelle at Flourchild -- thank you, Michelle! :) This pie was one of the recipes that really caught my eye when I flipped through The Sweet Melissa Baking Book for the first time, and I was going to pick it when it was my choice, but Michelle beat me to it! That's fine though, I got to make it earlier this way, and absolutely loved this recipe!


I could not find fresh tart cherries around here but did find some frozen ones...


I bought a couple bags and these turned out perfectly in the pies! Next time I see fresh sour cherries (aka tart or montmorency cherries) I will pick up some just to make this delicious pie again. It was a last minute decision to make mini pies, I looked at my pie plates and did not have a 10 inch one, I had a 9 inch and a 9.5 inch...I was going to use the 9.5 but then thought mini pies would be easier to serve up to the kids, so I took out a standard muffin tin and got to work.


My changes were to use butter and margarine instead of butter and shortening in the pie crust --which I think turned out fine...


and to make the pistachio crumble in the food processor, since the oats and pistachios needed to be crushed up in there anyway, I figured it'd be easier just to make it all in there...perfect !


These little pies were absolutely delicious, not too sweet, not too tart, just amazing. The perfect combo of textures and flavors. I can see why this is a popular pie -- I will be making it again for sure.


Last Sunday, Katie of
Katiecakes (isn't that the cutest blog name?) picked Guinness Gingerbread for us to try... I baked along but didn't get a chance to post about it last weekend...


I used this holiday ale instead of guinness since we had some on hand, and used this Nordic Ware "fairy tale cottage" pan to bake the gingerbread in...


My only change to the gingerbread was to leave out the white pepper...I am really not a black or white pepper fan, sorry! The gingerbread was delicious, I loved all of the flavors and would make this recipe again for sure. My kids were crazy about the gingerbread, the all loved it and wanted me to make another when this one was all gone, I told them they might have to wait until next Christmas for some more gingerbread, but you never know :) I have to say I don't think this recipe is the best for a shaped pan, even though the volume was correct, it just didn't turn out as cute as I expected it to -- guess I will have to try the gingerbread recipe that came with the pan and hope for better results.


Lastly, a quick photo of the Lemon Icebox Cake...when I posted about this recipe I had not served it or tried it...


and there it is. I have to say that this recipe totally surprised me, in a good way! I didn't think we would really care for this one, and if it hadn't been picked by Jennifer of
Keep Passing the Open Windows as out Sweet Melissa Sundays recipe, I probably would have skipped it, but we all loved it, what an amazing cool and refreshing dessert, yum :)

Simplicity

Most of our time is spent outside right now, we enjoy nature in all its beauty and the simplicity of play.
a little bag for the flowers
little puppy dog with dog leash included
bed with blanket for the puppy dog
and delicious dog food

End of the Year - Diplomas

This has been a wonderful year. One of the best I have ever had. I have watched my "children" grow and learn. They have come so far in this short school year. It really doesn't seem possible that just yesterday it was August and the school year started and now today it is over.
I would like to thank the parents and children for making this year such a wonderful one. Please enjoy the summer. Be safe. Come back and visit me often next year. I will miss you guys.


so proud of their diplomas


look we graduated from preschool


showing off their diplomas


time for one last shot with Ms. Betty, Mrs. Jaclyn and Mrs. Eileen

seeing green

This year is all about food producing plants. Green is the color of 2009.

tomato seedling

apples

I'm really excited about these columnar apple trees... the Northpole variety I bought came with a few tiny apples already on it. If you're not familiar with these, they are the perfect way to grow apples in a small space. Vertical with almost no branching. Disease resistant. Plants grow to 8-12 feet tall. Can be grown in a pot or directly in the ground. I also bought the Scarlet Sentinel variety. Like blueberries, they do need two different varieties to pollinate (these can be within a block of each other).

As you may recall, I planted several kinds of vegetable seeds inside a couple months ago, to get a jump start on spring. The seeds sprouted, turned into seedlings, and have now been planted outside. It’s amazing what a bit of sunshine and a torrential rain or two can do! I learned a thing or two in the process. First of all, some things do not benefit much from being started inside. Others just aren’t worth all the trouble that’s involved in this process of protecting from cold, protecting from too much heat, and watering, watering, watering, then moving the small starts to larger pots until the outside soil temperatures rises, then watering some more. Truth is, I just don’t have time for so much nurturing in my life!

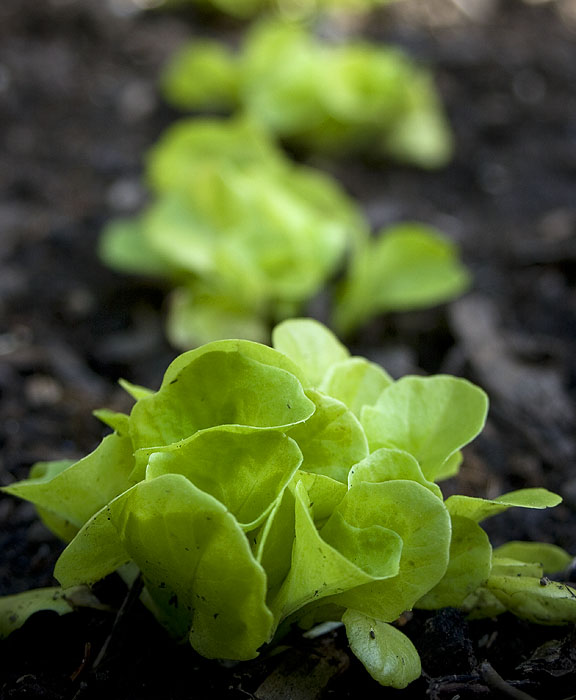
Butterhead lettuce. Started inside 11 weeks ago...

butterhead lettuce

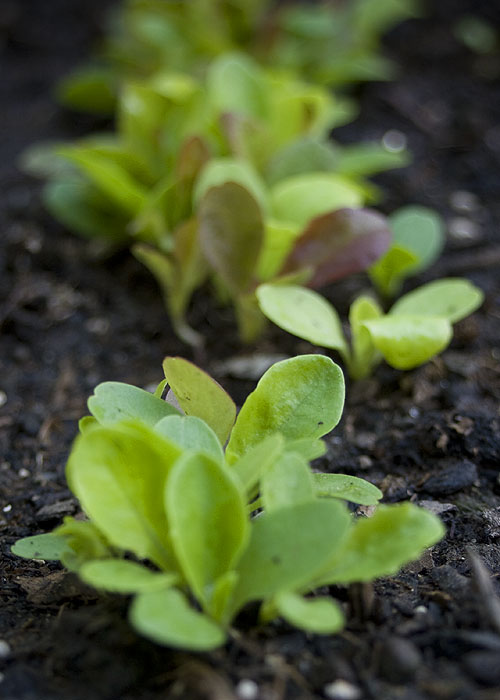
Mesclun mix lettuce. Started outside two weeks ago...

mesclun mix lettuce

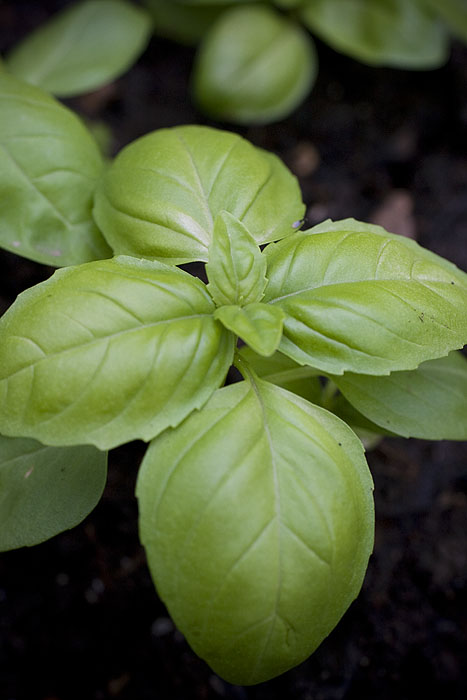
sure do love basil...

basil

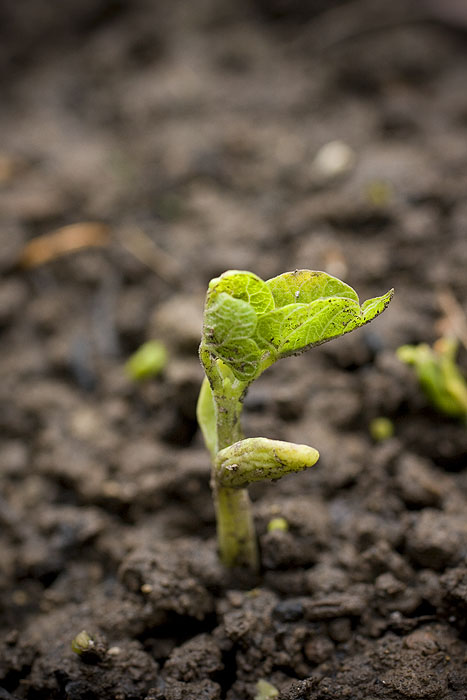
the lone bean seed that sprouted. Pretty sure some chickens gobbled up all the others...

bean sprout

Kermit the Frog said it best... "It's not easy being green!"
Happy spring!

Last Day of PreK

We celebrated our last day of Preschool with a big outside party with blow up bouncers, bubbles, sidewalk chalk, tricycles, snow cones and freezer pops. Thank you to all the parents who helped with his fun event.


blowing bubbles with friends


Going down the slide with Ms. Jaclyn


Lined up for snow cones .


Enjoying her snow cones


Time to race on the tricycles


Whee fun on the slide!!


going fishing in the water table


face painting

WOW that is a big slide