Fun weekend with Grandma!

My mom came down for a long weekend. On Friday I escaped from work and we headed to the Quail Botanical Gardens for the day. The weather was perfect and all of us girls had a great time!
The train was fascinating, the tree house and sand board pit was great, and the turtles in the Lily pad pond were mesmerising.

 The Bamboo Forest "Where mommy said the wild things live" were cool but a bit spooky.
The girls went on a 'hunt' to find the "Wild Things"
  Grandma Mar got to spend lots of time just playing with all four of her San Diego grand kids!

 Grandma and Lola
 Grandma and Aiden
 Grandma and Ellie
Grandma and Liam

Thanks mom for a great weekend!

One Last Mad Science Monday

We went to the season's last science class at the library.  The girls will be sad to see it end...  But today's topic was pretty fabulous.  They made oobleck!  That's the name (taken from a Dr. Seuss story) of the oh-so-interesting neither a solid nor a liquid slime that comes from mixing corn starch and water.  It is great, messy fun!
Rachel was not a fan at first.  It was hard for her to get over the fact that her hands were messy.  But she eventually did and then had a grand time.
Katherine adores oobleck and pretty much anything else slimey, so she thought the whole project was just fabulous!
So we stayed and played until dinner.
When Ms. Jo, the children's librarian asked the group which mad science activity had been their favorite, there was a unanimous shout of "This one!"  Oobleck is just cool.


Three Bite Chocolate French Silk Pies


Three Bite Chocolate French Silk Pies


Although this is my fourth bite-size pie post (see Bite Size Banana Cream Pies, Bite Size Chocolate Cream Pies, & Bite-Size Coconut Cream Pies), I really think that this is where my original idea started.  It's just taken me this long to follow through.  I really love chocolate French silk pie.  The ingredients of the filling are simple: butter, sugar, chocolate, vanilla and eggs.  Raw eggs.  So proceed with caution.
For the cookie base, I wanted the challenge of making everything from scratch, but I really think that if you wanted to break open a package of Oreo cookies and scrape out the filling, they would work just as well.  Or if you're a traditional silk pie fan, you could use regular pie crust.  What I have below is actually adapted from my Swedish Cream Cookie recipe by replacing some of the flour with cocoa powder, and it really tastes good with the French silk pie filling.  Then again, that filling would probably taste good on dirt.  Do what works for you.
When making these, or any other French silk pie, make sure you use UNSALTED butter.  It makes a difference in the flavor.  For the cookie part, it doesn't matter so much, but with the filling it does.

Three (or One) Bite Chocolate French Silk Pies

WARNING: THIS RECIPE CALLS FOR RAW, UNCOOKED EGGS!

INGREDIENTS

Cookie (You can skip this part and just use the cookie parts of Oreos):
  • 1 cup salted butter
  • 1 1/2 cups King Arthur Unbleached All-Purpose Flour
  • 1/2 cup cocoa powder
  • 1/2 teaspoon salt
  • 1 1/2 teaspoons baking powder
  • 1/3 cup cream
  • 1/2 cup granulated sugar + 2 tablespoons cocoa powder (for dusting)
French Silk Pie Ingredients:
  • 3/4 cup unsalted butter, cool, but not hard
  • 1/3 cup white C & H sugar
  • 18 unwrapped Dove Dark Chocolate Promises (about 5 ounces)
  • 1 1/2 teaspoons vanilla extract
  • 3 large eggs, cold
  • Stabilized whipped cream* (recipe below) or 1 cup heavy cream whipped with 1/4 cup powdered sugar
  • 2 tablespoons chocolate sprinkles or shaved dark chocolate

DIRECTIONS
1. Mix flour, cocoa powder, salt, and baking powder in a medium bowl.  Cut 1 cup of the butter into the flour until the mixture resembles coarse crumbs. Stir in the cream and form the dough into a ball. Divide dough into thirds, flatten into a rough disk about 1/2 inch thick, and wrap dough in plastic wrap.  Refrigerate for at least 1 hour. (Note: I do all of the mixing in my Kitchen Aid with the paddle attachment, and they turn out fine.  The original recipe calls for the cutting in of the butter.)
3. Dust a cutting board with the sugar/cocoa mixture.  (I like to roll my dough between two sheets of wax paper and dust that with the sugar/cocoa.) Roll dough out 1/8-inch thick and cut with a 2 " circle or flower cutter for three-bite pies, or 
1 1/2” circle or flower cutter for tiny pies.  Place circles/flowers on a parchment-lined baking sheet. Prick cookies three times with a fork.


4. Bake at 375°F for 10 minutes.  Cool on pan for 5- 10 minutes before removing carefully to a wire rack to cool completely.  (Be careful.  I dropped one on the floor and it shattered into powder.) 


5.  In a double boiler, melt Dove Promises about 2/3 of the way.  Remove top of double boiler and continue to stir until chocolate is completely melted.  Set aside to cool further.  I recommend cooling until the chocolate starts to thicken slightly so that it won't melt the butter.
6.  In a large bowl or in the bowl of a stand mixer with the wire whip attachment, cream butter.  Gradually add sugar, creaming well.  Blend in melted and cooled chocolate and vanilla.  Add eggs, one at a time, beating 4 minutes after each addition with mixer on medium speed.  
7. Transfer filling either to a pastry bag fitted with an open star tip or a large zip top bag that you will later cut 1/2 inch off the corner.  If the filling seems a bit loose and you don't trust that it will hold its shape and stay on the base, then refrigerate for about 10-15 minutes, or until you can pipe it and have it hold its shape.  If the filling seems firm, start piping onto cookie bases.  Refrigerate until firm, at least 30 minutes.
8. Top with whipped cream squeezed out of another pastry bag with open star tip or zip-top bag.  Top with sprinkles or shaved chocolate, if desired.  Refrigerate until ready to serve
Makes about 70 three-bite pies, OR about 120 one-bite pies (I think.  Don't hold me to that.)
Stabilized Whipped Cream Frosting
--adapted from cdkitchen

  • 1/2 tsp unflavored gelatin powder
  • 2 tbsp cold water
  • 1 cup whipping cream
  • pinch salt
  • 2 tbsp confectioner's sugar
1. Sprinkle gelatin over cold water in small bowl to soften. 
2. Scald 2 tablespoon of the cream; pour over gelatin, stirring till dissolved.
3. Refrigerate until consistency of unbeaten egg white. (This takes about 10-15 minutes.) 
Then, with a whisk, beat until smooth. 
4. In a stand mixer with a whip attachment, or with a hand beater, whip remaining cream, salt and sugar; whip in the smoothed gelatin mixture, stopping to scrape the bowl twice.
*A note about the stabilized whipped cream: this is really the way to go if you plan for these to last more than one day.  The two pictures at the top of this post were taken on the third day of these little pies' lives, and the whipped cream sill looks perfect.  Just saying.


One three biter and two one biters

anniversary and a hotel tour

It started as an every five year ritual. We returned to The Heathman hotel where we spent our wedding night. I’m not sure exactly when this happened, but it’s now an annual tradition. This year we mixed it up and stayed at The Benson. Like The Heathman, The Benson is a historic downtown Portland, Oregon hotel, rich in history and tradition... just like our relationship :-)

We got a sweet deal on a penthouse suite. This was the view we were greeted with upon arrival.

Rainbow

Nice!

bedroom

Off the small seating area with the rainbow view, the bedroom is behind french doors.

bar

There’s enough storage here for me to stay for weeks. Our room had several cabinets and drawers like you see behind me.

cocktails

A comfortable lobby bar serves decent cocktails and a yummy cheese plate.

chandelier

a few of the architectural details...

window

CandM

Hi!

roomService

As you can see, room service breakfast was good, but if I were comparing it to The Heathman, the quality of the food and its presentation was lacking The Heathman Hotel’s exquisite taste and attention to detail. 

While we’re on the subject of hospitality, the entire Benson staff could use a lesson in the value of attending to details. The slightly tattered furniture, even though it added to the antiquity of our room, didn’t appear to be intentionally shabby chic, but scruffy and run-down. The maids had missed the lipstick kiss left on the french doors... tacky!

morning

I hope you enjoyed this little tour. In case you missed my Heathman post from a couple years ago, you can check that out here.

Salsa and Cheese Sopes


I had heard of sopes before but hadn't tried them and weren't quite sure exactly what they were.  Now I know that they are little masa "boats" or cups that are pretty much made from corn tortilla dough and filled with any kind of Mexican filling you'd like.  I made these on a whim and hadn't done any sope googling, I did that after I made these, just to see if mine looked like what they are supposed to look like, well, after looking at the google image sopes page I've come to the conclusion that I did some major skimping on the filling! These are supposed to be stuffed to the brim with yummy fillings and I barely put anything in them...oh-well! They were still delicious and now that I know better I will make a very well stuffed sope next time I make them :)

Perfectly Simple Sopes (Masa Boats)
Sopes Sencillos
adapted from Rick Bayless's Mexico One Plate at a Time

1 and 3/4 cups powdered masa harina mixed with 1 cup plus 2 tablespoons warm water
Salt
About 1/2 cup chopped white onion (I left this off, not an onion fan)
Vegetable oil for the griddle
3 tablespoons vegetable oil
about 3/4 cup salsa (I used Rick's Roasted Tomato and Jalapeno Salsa, recipe below)

about 1/3 cup grated Mexican gueso anejo or other dry grating cheese such as romano or parmesan (I used Cotija, a Mexican grating cheese that I had never tried before this, it is delicious!) About 1/4 cup chopped fresh cilantro

1. Forming and griddle-baking the sopes. Heat a well seasoned or nonstick griddle or heavy skillet over medium heat. Put the masa (fresh or reconstituted) into a bowl and knead in 3/4 teaspoon salt. If necessary, knead in a few drops of water to give the masa the consistency of soft cookie dough. Divide into 16 pieces, roll into balls and cover with plastic to keep them from drying out.


One by one, form the fat little tortillas that will become the sopes: Line a tortilla press with two pieces of plastic cut to fit the plates (to be on the safe side, cut them from a food storage bag; the thicker plastic usually works better for beginners). Gently press out a flattened ball of dough between the sheets of plastic to about 3 and 1/2 inches in diameter (it should be a little less than 1/4 inch thick). Peel off the top sheet of plastic, flip the fat little tortilla - uncovered side down - onto the fingers of one hand and then gently peel off the second piece of plastic. In one flowing movement, roll the tortilla off your hand and onto the heated griddle or skillet. After about 1 and 1/2 minutes, when the tortilla has loosened itself from the cooking surface and is lightly browned, flip it and cook for another minute or so - this cooking is just to set and brown the surface of the tortilla but not to cook the masa all the way through. While the first tortilla is cooking, continue pressing out others and adding them to the griddle or skillet; just be careful not to leave them on so long that they cook through.


Remove each lightly browned tortilla to a plate. Cool just until handleable, then use your thumb and index finger to pinch up a masa border about 1/2 inch high around then edge of the tortilla - in doing this you are transforming the fat little tortilla into a sope, a little masa boat. Press out the center to uniformly flatten it. Cool the sopes, then cover them with plastic to keep them from drying out. 


2. Finishing the sopes. In a strainer, rinse the onion under cold water, then shake off the excess moisture. Set out the remaining ingredients near the griddle. Heavily oil the skillet or griddle (my 12 inch griddle takes about 1/4 cup to oil it properly) and heat over medium. Fill the griddle with a single uncrowded layers of sopes, flat side down, then brush each one with oil. Spoon about 1/2 tablespoon salsa into each sope, then sprinkle with a little chopped onion, grated cheese and chopped cilantro. Leave on the heat until the bottoms of the sopes begin to crisp and the salsa is warm, 1 to 1 and 1/2 minutes . (You may see the salsa boiling around the edges.) Serve on a warm plate or a wooden board without a moment's hesitation - your guests will love biting into this simple perfection. 


~~~~~

These were really delicious! I'm sure I'll be making sopes often and filling them to the brim with yummy cheese and maybe beans and salsa.  I made half of these with just cheese for the kids since the salsa was quite spicy.  The other plate I made I brought out to the living room for my husband and I to snack on and went back to the kitchen to pass out some to the kids, well by the time I got back picky husband had finished off the whole plate of these!  At first he was a little apprehensive since he doesn't like to try new things but he really liked these.  He is a corn tortilla fan and these had that nice toasty corn scent and flavor so I kind of thought these would be a big hit and they were :)

Here is the recipe for the salsa I made to go with these...

Roasted Jalapeno Tomato Salsa with Cilantro
Rick Bayless - Salsas that Cook
5 cups salsa

3 pounds ripe tomatoes
4-6 jalapeno chiles, stemmed
1 small white onion, sliced 1/4 inch thick
8 garlic cloves, peeled
1/2 cup water (I did not add this, the salsa was plenty fluid without extra water)
2/3 cup chopped fresh cilantro
2 generous teaspoons salt
1 tablespoon cider vinegar


1. Heat the broiler. Lay the whole tomatoes and jalapenos out on a broiler pan or baking sheet. Set the pan 4 inches below the broiler and broil for about 6 minutes, until darkly roasted - even blackened in spots - on one side.  With a pair of tongs, flip over the tomatoes and chiles and roast the other side for another 6 minutes or so. The goal is not simply to char the tomatoes and chiles but the cook them through while developing nice roasty flavors. Set aside to cool.


2. Turn the oven down to 425 degrees. Separate the onions into rings. On a similar pan or baking sheet, combine the onion and garlic. Roast in the oven, stirring carefully every couple of minutes, until the onions are beautifully browned and wilted (even have a touch of char on some of the edges) and the garlic is soft and browned in spots, about 15 minutes total. Cool to room temperature.


3. In a food processor, pulse the jalapenos (no need to peel or seed them) with the onion and garlic until moderately finely chopped, scraping everything down with a spatula as needed to keep it all moving around. Scoop into a big bowl. Without washing the processor, coarsely puree the tomatoes - with all the juice that has accumulated around them - and add them to the bowl. Stir in enough water to give the salsa an easily spoonable consistency. Stir in the cilantro.  I just processed it all together.


4. Taste and season with salt and vinegar, remembering that this condiment should be a little feisty in its seasoning. If you're planning to use your salsa right away, simply pour into a bowl and it's ready, or refrigerate it covered and use within 5 days.  


~~~~~

The salsa was pretty yummy and very spicy. Picky husband liked it, yay! It was too spicy for the kids.  My only personal thing was not liking the onion, but I know most people like onions so that's my problem :) I think from now on I will leave the onion out unless it gets completely pureed or just use onion powder.  The sopes were awesome and I'm so glad I now know what they are and will be making them often. They were fun to make and were my first time using my new cast iron tortilla press, I've wanted one of those for years and finally got one since IHCC will be cooking Mexican for the next few months! Yum!


Muffins, Zuchinni, Seeds, Love, Wisteria


Spicy Zuchinni and Apple Muffins
(makes 24)
3 cups of self raising flour
pinch salt
3 tspns of mixed spices that you like - nutmeg, ginger, cinnamon, ground cloves etc
11/2 cups raw sugar
2 eggs
1/2 cup grapeseed oil
1 cup grated apple
2 cups grated zuchinni
1/2 cup chopped pecans, walnuts (also fine without when baking for lunch boxes)

Heat oven to 180 c
Grease muffin tins
Mix all dry ingredients in bowl
Mix wet ingredients in separate bowl
Make well and incorporate ingredients together
Bake until golden brown
 approx 20mins


Romance is not huge in our house.  Occasionally I like to surprise Mr Bowerbird with one out of the box. Or in this case out of the zuchinni. I was up late, grating and freezing zuchinni,  making zuchinni muffins, and saving zuchinni seeds. Suddenly I was inspired to leave a seedy message.


And this is his reply.
 I was quite taken with the creative use of oats.

The declarations of love didn't photograph so well early in the morning so I've given them a little glamour courtesy of the new photo effects in Picasas 3. I've been resisting this sort of photo filtering on my blog and have been keeping it real (I also don't have an iPhone, so don't have ready access to the likes of Instagram). However, sometimes life is a little boring, or the hues in a photograph just don't do the occasion justice. Actually the more I played with the photo editor, the more I thought that photos looked better in the 70s. I wonder if, in the future, we'll look back at all the heavily altered pictures of this decade and roll our eyes, so 2012. Are you a filterer?


It has been great gardening weather.

We've been pruning back our rampant wisteria.  I  mistakenly said to my partner to go hard, as the darn thing needs constant control.  Without any discussion, he decided to cut the thick vines at waist height, killing masses of the plant in all directions. Not quite what I had in mind. Then he left this dead material for me to stare at in dismay for weeks. I said I hated looking at it, as it's right at the front door. Oh well, he said, we don't get many visitors. No zuchinni seeds tonight! 

After a huge day of pruning and hauling wisteria to the burn pile we discovered our verandah was seriously rotten underneath, so perhaps the hard prune was fortuitous and may save us being struck from a falling beam.
While the clippers were out I got a little snip happy and gave some other plants a prune. The little Bowerbird decided the balls looked like a critter and gave them a face.

This mock orange is another unweildy member of the plant kingdomm constantly sending out shoots all over the path and into the meter box.  A hard prune for it too. Some plants should come with warnings!

There has been lots of weeding.

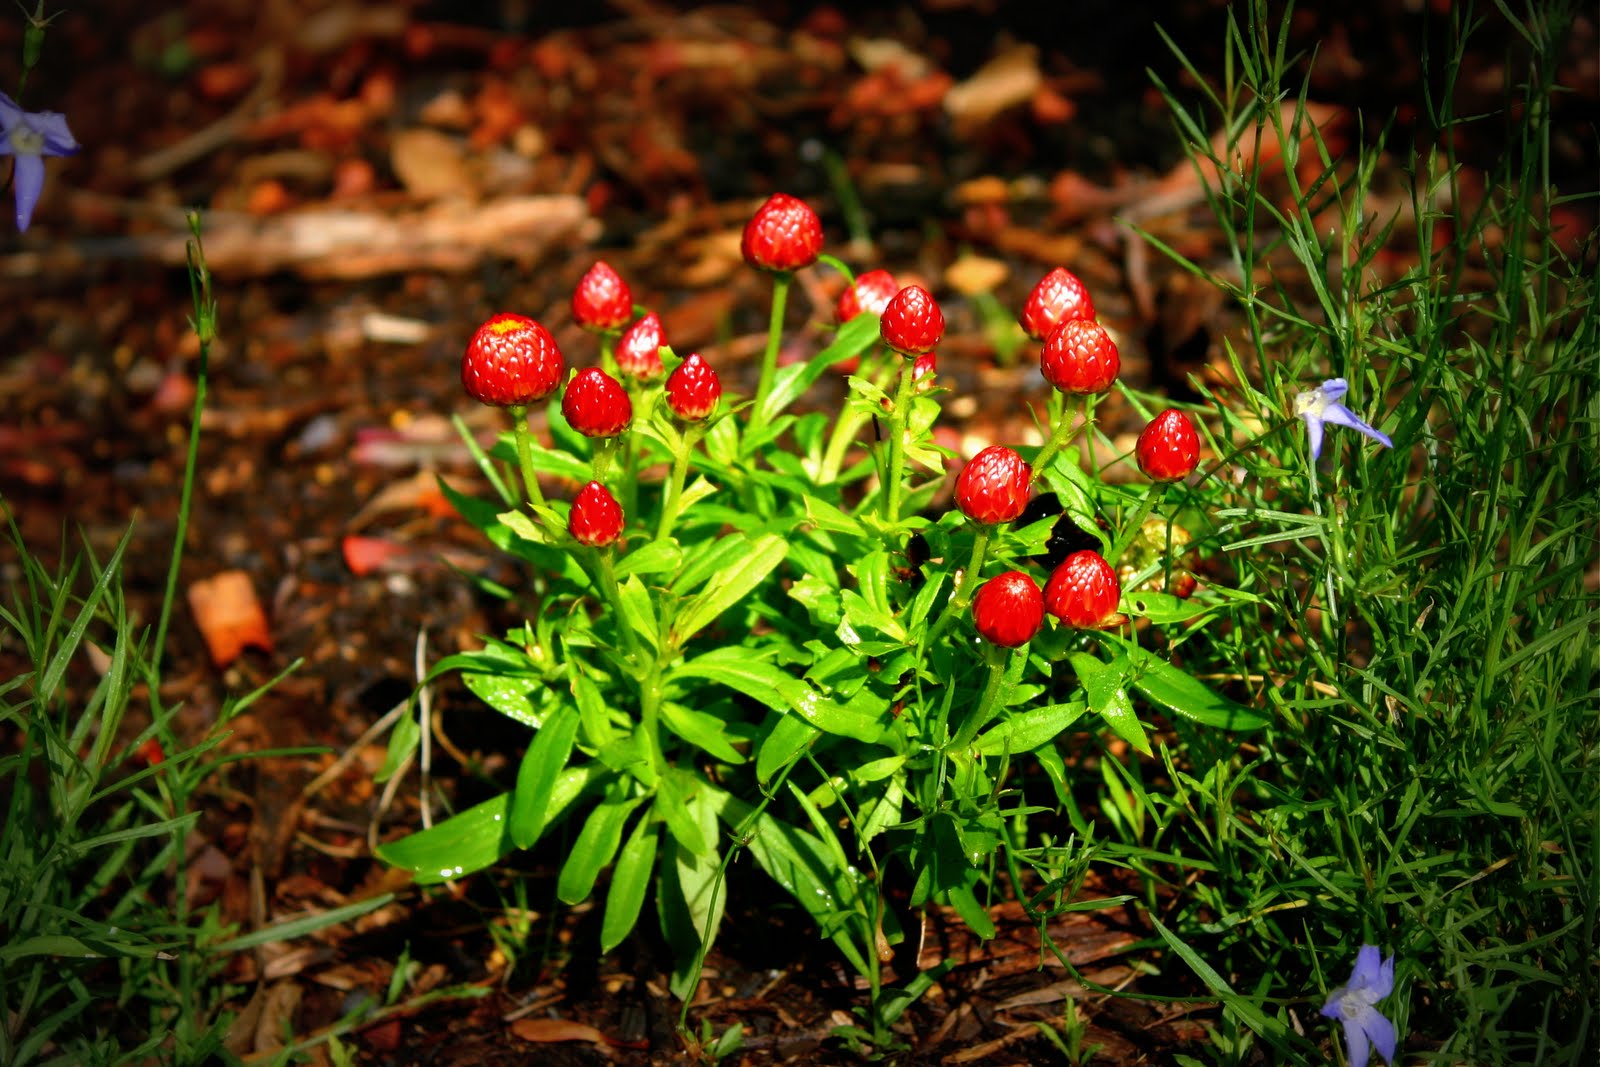
And some stopping to smell the flowers.  The first pink Boronia of Autumn, I adore the smell of Boronias, especially the finicky Brown Boronia. I love how paper daisies close their flowers when there is no sunshine, it's as if they're saying brrrrr.


The corn without cobs also faced the wrath of the secateurs, I think we will pick the last of it this week. 
Some new visitors to our garden that I am quite chuffed about. Choughs. They're searching for bugs to eat amongst the fruit tree mulch. I have seen them frequently in our area, but never in the backyard.  These are wonderfully communal birds that hang out in groups of 7-10, they all pitch in and help to raise the young together. I planted some snow peas beside the Apricot today.

They are actually unimaginatively named White-winged Choughs, because they have white visible on their wings when in flight. A great site to find more about birds is Birds in Backyards, here is their link about Choughs -  http://www.birdsinbackyards.net/species/Corcorax-melanorhamphos

The epic sawdust paths mission is nearing completion. Mr Bowerbird has also been fixing some of the beds with reclaimed red gum sleepers. Our neighbours cat thought we had built a giant kitty litter for it, and left us an unwelcome surprise.
The garlic is racing upwards, I keep finding last years forgotten garlic in new places, these are all transplanted garlic. The potatoes from the last crop keep trying to re-emerge amongst the garlic, I can pick the purple congo potatoes before digging them up, as their leaves have purple veins.

 Would you cut these beautiful old twisted vines?